
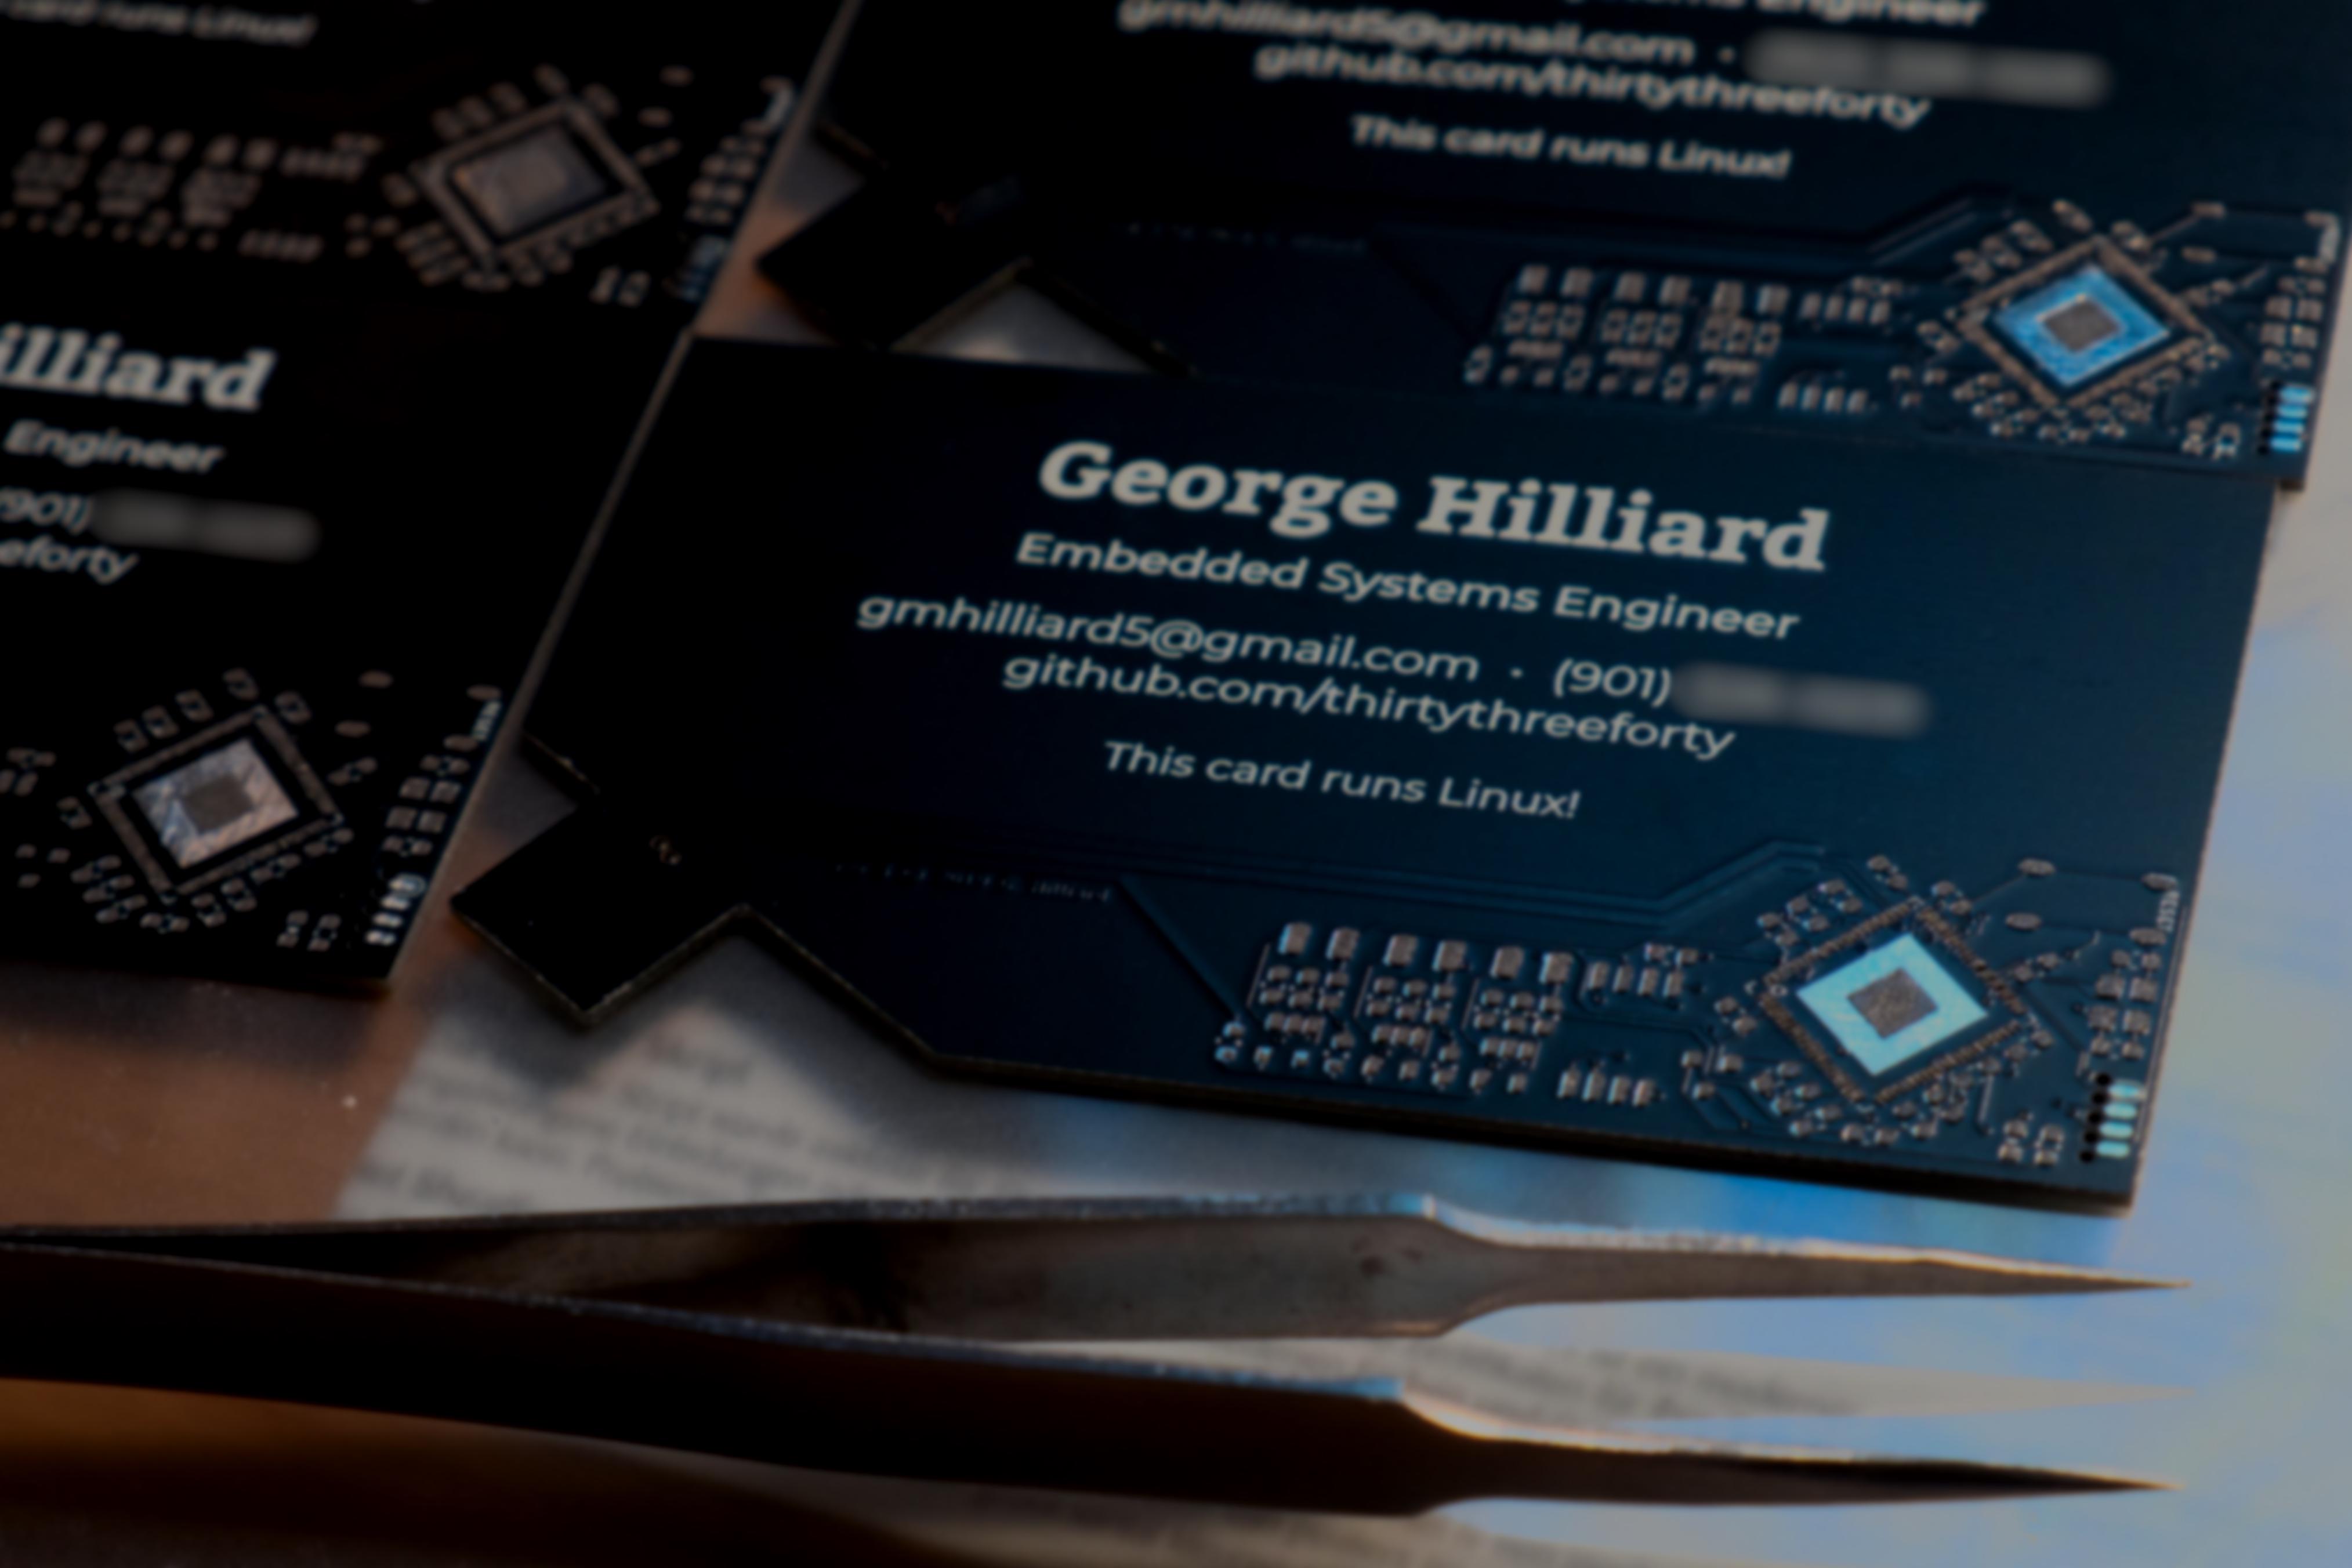
I recently built a business card that runs Linux. This is a detailed design log, plus a few random notes, from the build. If you want to see the blinkenlights, first you should go read my other blog post detailing the finished product.
")
Designing the computer
First and foremost, I would need to choose a Linux-capable processor, because it would be the driving factor in the affordability and feasibility of the final product.
Picking a processor
I started by looking for processors that were the magic combination: inexpensive, USB, no BGA footprints, and purchasable somewhere, even if I had to get it from Taobao. (You usually can’t buy these processors from Mouser or the manufacturer.) Ideally, there would also be a known-good piece of hardware I could get as a development board.
I also really wanted a part that had RAM included in the package. This is fairly rare for microprocessors, in contrast to micro_controllers_ which typically don’t have enough juice to run Linux. This constraint really narrowed down my choices, but I stuck with it because it would make design and assembly a lot easier.
Many of the processors in this price class are made by Chinese companies and there’s not a lot of info about them available in English, so finding them takes some digging. (If you know of other Chinese-only processors in this category, please let me know about them as I would be excited to learn about them.)
My first attempt was using an STM32F4, which can be persuaded to run Linux if it’s hooked up to external SDRAM, like in this Emcraft Systems system-on-module.
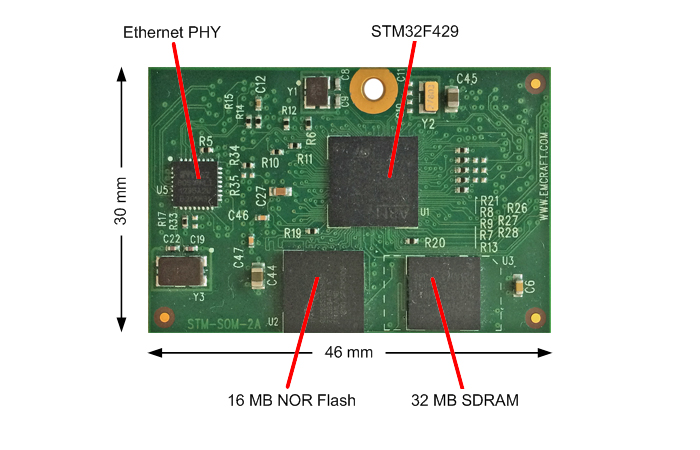
Unfortunately the STM32 parts that can be hooked up to SDRAM are BGA, or else they use obscure RAM buses that I can barely find any documentation for, let alone buy parts for. The nail in this coffin is that the cheapest STM32F4 that would work was around $9 for the processor alone. That’s too expensive if I’m going to give away the result.
I looked around a lot at the chips used in really cheap routers. Parts like the AR9331 are ancient MIPS-based designs that continue to be used in bottom-of-the-line routers. Unfortunately most of these parts are—you guessed it—BGA, and even the ones that aren’t, still don’t have RAM included.
Really what I wanted was a really cheap processor for IoT, dashcams, or tablets. I struck gold with Sipeed’s Lichee boards, which are the cheapest Linux development boards I’ve seen anywhere.
The Lichee Zero has an Allwinner V3s, which seemed to tick all the boxes. It’s QFP, has 64MB built-in RAM, and there are even people selling them on eBay.
")
The V3s is very well supported by the sunxi community.
Unfortunately the best price I could find was around $4 on Taobao. This wasn’t the end of the world if it was the best I could do, but I kept looking.
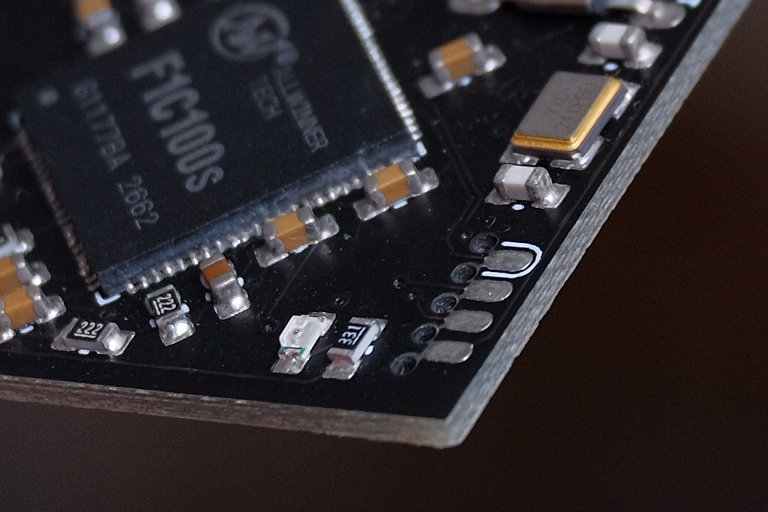
Finally I found my pigeon: the Lichee Nano uses a very small Allwinner part called the F1C100s.
")
Here’s the Nano next to an SD card. Pretty small.
This is an ARM9 design Allwinner apparently makes for dashcams. ARM9 is ancient technology, but I am not trying to win any performance awards. The part comes in a QFN package with a rather small 0.4mm pitch, but at the end of the day it’s still workable with a steady hand. It has 32MB RAM in the package, which is a veritable bounty for my purposes.
It is astoundingly cheap for a Linux-capable processor: In single quantities, I found it at $1.20 or so on Taobao, and recently I’ve seen listings for $0.90 apiece. I bought a big bag of them (top left).
")
(It turns out that you can buy nearly any chip under the sun on Taobao. I used Superbuy to batch up my purchases into one box shipped overseas.)
Finding resources for the F1C100s
The best resource I found was that Sipeed actually published their schematic for the Lichee Nano. This was absolutely invaluable as there were several places in the datasheet where a pin was named, but there was nothing explaining what you should do with the pin.
Googling around also led me to the reference manual for the F1C600, which is apparently an F1C100s rebadged as Linux-capable. So I had register definitions and a real datasheet.
I want to reiterate that I’m doing this as a hack. Using random schematics you find on the internet is not the best way to build a product.
Allwinner does not support this part unless you are a large company and get in touch with them directly. The F1C100s so cheap that it’s not even supported by the sunxi folks, but some work was done in early 2019 getting the part supported the Linux kernel. I found a branch on GitHub by Icenowy who added drivers for some of the other peripherals.
I also found a port of U-Boot.
With all this, I decided that the software was complete enough that I could write drivers for anything else I needed.
Everything else
Once I had the processor picked and laid out in KiCAD, the rest was reasonably easy. I made sure the interfaces were all very similar to the Nano, so that I could get my code working on the Nano and hopefully everything would Just Boot on the business card.
I used ordinary NOR flash for storage and added an LED for bling.
The first version had an unpopulated JTAG header on the back in case I got into dire straits; this proved unnecessary and I removed it on the second spin.
I also threw in a Shitty Add-on header, just in case I needed UART on the final card. This was removed on the second spin and replaced with a nice compact SOICbite footprint; I have needed neither.
Here’s the schematic; click to download. I hope it helps you if you want to use this part. Feel free to contact me if you have questions.

Designing the physical card
Sizing
Board space was not a problem; the computer easily fits in the bottom corner of a standard-size card. A bigger problem was that I wanted the card to be as thin as possible; however, a PCB must be 2.2mm or so thick to make it fit in a USB port. I solved this by selecting 1mm PCBs and laser-cutting some 1mm acrylic into appropriately-sized spacers. The final assembly step is to superglue this spacer into place.
Graphic design
Designing the text of the card was easy enough, but because there’s no way to use custom fonts in KiCAD, I needed to import it as a vector.
Unfortunately there is not a good solution to putting vector images on any layer except Edge.Cuts, and of course I did not want to do that.
The best way I found was to export the design from Inkscape as a super-high-resolution 4000dpi PNG file, then trace it as a footprint in KiCAD using bitmap2component.
")
Although tracing a bitmap makes my inner typographer cringe a little, in practice the resolution of the footprint far exceeds the board house’s capabilities and it looks great without hand-tracing every letter.
")
Plenty of points here on the curves.
USB
Routing USB was tricky on this board because the traces are fairly long. Although I’m just using full speed USB, which is pretty forgiving, I still did my best to impedance-control these traces. The USB traces are comically large because the two-layer board makes getting decent capacitance difficult. Thank goodness it’s only 1mm thick (a standard 1.6mm board would make the traces even fatter).
Hand-assembly
I’m laser-cutting my own stencil. The 0.2mm apertures for the processor pins are at the hairy edge of what the machine is capable of. I ended up cutting the pins in two passes, skipping every other one, to prevent them from all melting together as the laser cut them one after the other.
If I ever need to go any smaller, I’ll definitely just order a stencil from OSH Stencils.
Software
Porting U-Boot and Linux
The first step of porting Linux to any board is getting U-Boot up and running.
Someone on GitHub named Icenowy had done some work getting an older U-Boot version running on the part; it was in rough shape but it would boot, which I was very glad about. I rebased this onto v2019.04 and added support in a couple drivers for various other mostly-uninteresting subsystems like the pin controller and clock.
Due to a bug, about 70% of my overall effort on the software was spent getting U-Boot to talk to the flash. U-Boot has a driver for the SPI peripheral on this part, but it didn’t work. The symptom was that the SPI peripheral could detect the flash chip, but always read garbage from it. It turned out that U-Boot likes to reset the SPI peripheral when it’s done with it. This apparently hasn’t caused any problems for other Allwinner parts. However, on the F1C100s, resetting the peripheral unsurprisingly erases its configuration registers, especially those for setting speed. Once I figured this out, it was a quick fix to reconfigure the registers when needed:
From 869a7c04f23fe9e10c26b7f1af9774ea813ea49a Mon Sep 17 00:00:00 2001
From: George Hilliard <thirtythreeforty@gmail.com>
Date: Wed, 19 Jun 2019 22:37:30 -0500
Subject: [PATCH] sunxi-spi: restore bus speed and mode after reset

The sunxi SPI peripheral driver resets the device completely (disabling
clocks and power) when the bus is released and turns it back on when
claiming.  On the F1C100s (and maybe others), the peripheral resets back
to default register settings, losing speed and mode settings.

Restore these settings when resetting the peripheral.

Signed-off-by: George Hilliard <thirtythreeforty@gmail.com>
Cc: Jagan Teki <jteki@openedev.com>
---
 drivers/spi/spi-sunxi.c | 10 +++++++++-
 1 file changed, 9 insertions(+), 1 deletion(-)

diff --git a/drivers/spi/spi-sunxi.c b/drivers/spi/spi-sunxi.c
index dbfeac77eec..2d02289d04d 100644
--- a/drivers/spi/spi-sunxi.c
+++ b/drivers/spi/spi-sunxi.c
@@ -35,6 +35,10 @@

 DECLARE_GLOBAL_DATA_PTR;

+/* Forward declarations of some reused functions */
+static int sun4i_spi_set_speed(struct udevice *dev, uint speed);
+static int sun4i_spi_set_mode(struct udevice *dev, uint mode);
+
 /* sun4i spi registers */
 #define SUN4I_RXDATA_REG		0x00
 #define SUN4I_TXDATA_REG		0x04
@@ -300,7 +304,8 @@ static inline int sun4i_spi_set_clock(struct udevice *dev, bool enable)

 static int sun4i_spi_claim_bus(struct udevice *dev)
 {
-	struct sun4i_spi_priv *priv = dev_get_priv(dev->parent);
+	struct udevice *bus = dev->parent;
+	struct sun4i_spi_priv *priv = dev_get_priv(bus);
 	int ret;

 	ret = sun4i_spi_set_clock(dev->parent, true);
@@ -317,6 +322,9 @@ static int sun4i_spi_claim_bus(struct udevice *dev)
 	setbits_le32(SPI_REG(priv, SPI_TCR), SPI_BIT(priv, SPI_TCR_CS_MANUAL) |
 		     SPI_BIT(priv, SPI_TCR_CS_ACTIVE_LOW));

+	sun4i_spi_set_speed(bus, priv->freq);
+	sun4i_spi_set_mode(bus, priv->mode);
+
 	return 0;
 }
Everything works great after this fix!
Linux 5.2 booted like a champ. Again, I ported Icenowy’s Linux work forward—some of it had been merged; some of it needed massaging to apply. Normal Linux kernel development stuff. There were a couple typos that I fixed to get USB working.
Building the flash image
The board has 8MB of flash. This must include the bootloader, the kernel, the root filesystem, and the small persistent partition. I decided to use UBI to house everything except the bootloader, which has to be positioned at the very front of the flash.
Using genimage, I define the physical partitions:
image flash.bin {
	flash {}
	flashtype = w25q64
	partition uboot {
		image = "u-boot-sunxi-with-spl.bin"
		size = 256K
	}
	partition rootubi {
		image = root.ubi
		size = 0
	}
}
Then, root.ubi is built from the partitions' images:
image root.ubi {
	ubi {}
	partition kernel {
		image = "zImage"
		read-only = true
	}
	partition dtb {
		image = "businesscard.dtb"
		read-only = true
	}
	partition root {
		image = "rootfs.squashfs"
		read-only = true
	}
	partition flashdrive {
		image = flashdrive.img
		read-only = true
	}
	partition persist {
		image = persist.ubifs
	}
}
During build, genimage uses this definition to automatically compile a binary ready to flash to the card.
Flashing a card
Once I’m ready to program a newly made card, I simply plug it into my laptop.
The processor can’t find anything to boot (the flash is blank), so it runs its built-in “FEL mode,” which lets me use a tool called sunxi-fel to send the generated image over USB:
output/host/bin/sunxi-fel -p spiflash-write 0 output/images/flash.bin
Flashing eight measly megabytes takes the better part of two minutes, because NOR flash has an amazingly slow write speed of around 100KB/s.
Finishing touches
Getting everything buttoned up is the hardest part of any project, in my opinion. I’ve been working on these blog posts, and cleaning up my Buildroot work, for the past month or so in my spare time. I hope to ultimately upstream all the software changes, and I’ve open-sourced everything for the benefit of the community.
Soon I hope to put together a “resource page” for the F1C100s with links to everything you need to get going with it. In the meantime, you can go get everything from the Resources section of my main write-up. I’ll also drop another plug for my ongoing Mastering Embedded Linux series. I’m walking through how to build hardware and software from scratch for tiny, cheap Linux systems much like my business card.
I hope you have enjoyed this write-up. Feel free to leave comments or drop me a line!